NEW KDHamptons DIY Diary: How To Dry Hydrangea Blooms

There’s no question that the official flower of the Hamptons is the hydrangea. Each summer, we all anxiously await for our first beautiful blooms in white, pink, blue, or green so why not try to preserve a bouquet for the off-season? I still have some giant-sized blooms at our house and I can’t wait to try this DIY project that KDHamptons contributing Entertaining & Design editors Maureen Anders and Adria Ruff shared with me for preserving them for the fall season. Check out this fun new Anders Ruff Design Diary below:

Maureen shares, “I do not claim to have the greenest thumb, but have been getting better! I DO know that I can dry some hydrangeas like they are going out of style. [It is not hard to let a plant die and dry out…. I am pretty darn good at that!]. Today, I thought I’d show KDHamptons readers a super easy way to make dried hydrangeas arrangements that are perfect to decorate your home for a long time! At our new house in Milwaukee, we have a huge bed of hydrangeas that I love to make arrangements from. As you can see, they are starting to get brown and dry out outside. I wanted to clip all of the ones that had no brown on them and dry them out to hopefully preserve the pretty greenish color.”


All you need are these MATERIALS:
– Pots of your choice (We love these Guy Wolff English pots (remember we shared the good find here!)
– Scissors or Garden Shears
– Hydrangea Stems [Use ones that aren’t browned yet]

STEP 1: Clip some nice looking hydrangea mop heads from your plants. I tried to get the ones that didn’t have any brown dried petals yet.

STEP 2: Cut the Floral Foam to fit your pots tightly. I used a serrated knife.

STEP 3: Trim the leaves off the hydrangea stems

STEP 4: Arrange starting from closest to the rim of the pot, working upwards, varying sizes of the flower blooms. You want the pot to look even on both sides, so try and keep consistent sizes for symmetry but mix in smaller ones for more dimension.
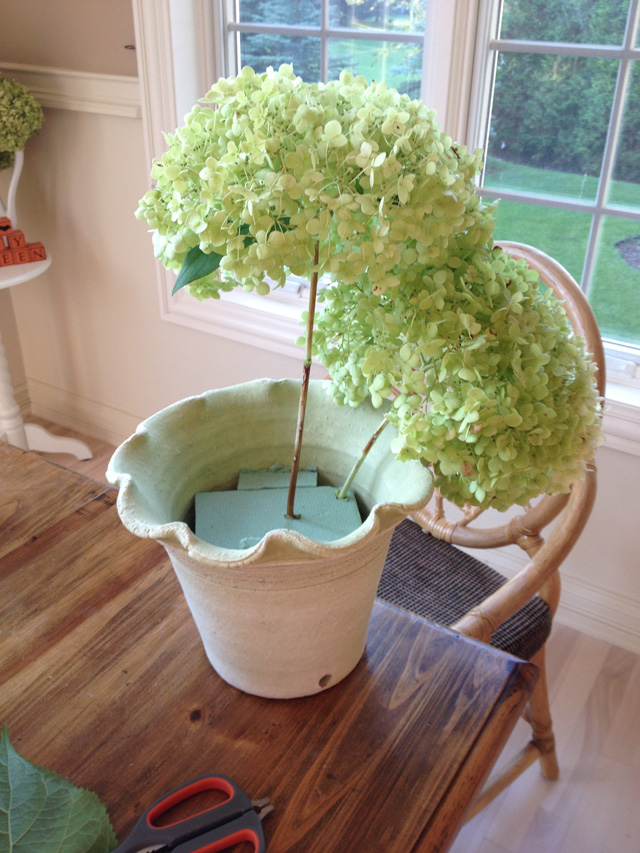
STEP 5: Check from all sides to be sure you can’t see any of the floral foam inside.
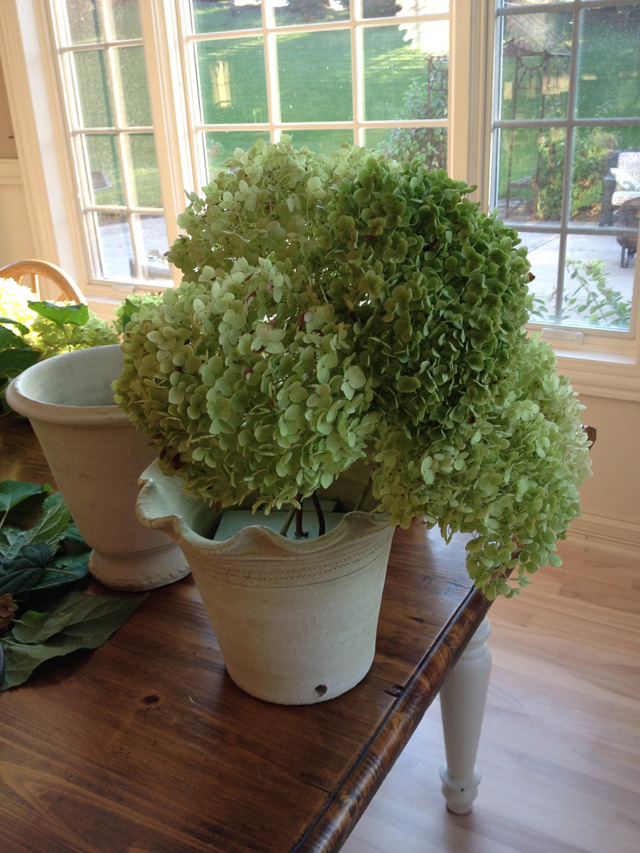
Wham, Bam, thank ya, mam! Done and done, and I can’t wait to look at these every day. I know that they will have a little color change and shrinkage, but they will still fill my room with a gorgeous look and texture. Until next summer, when I spruce it up with new ones!

This is SUCH an easy tutorial and you can fill fun wooden planter boxes, or antique boxes using the same techniques!

We filled up two of my favorite Guy Wolff Pots and put it on our display in our dining room.


Do you like this tutorial? Be sure to PIN IT for later!

**Also make sure you dry some blue and pink hydrangea which look great for a bar, bath or kitchen.

Anders Ruff is the BEST on-line shop for unique and chic printable invitations, decor and party accessories which make events so memorable, including: customized party invitations, cupcake toppers, favor tags, thank you notes, banners, and much more. KDH incorporates Anders Ruff ideas and printables in all of our Hamptons events and parties to give them that extra special touch. Be sure to check out their website, Instagram, and facebook accounts at Anders Ruff.
